ImageTool Manager
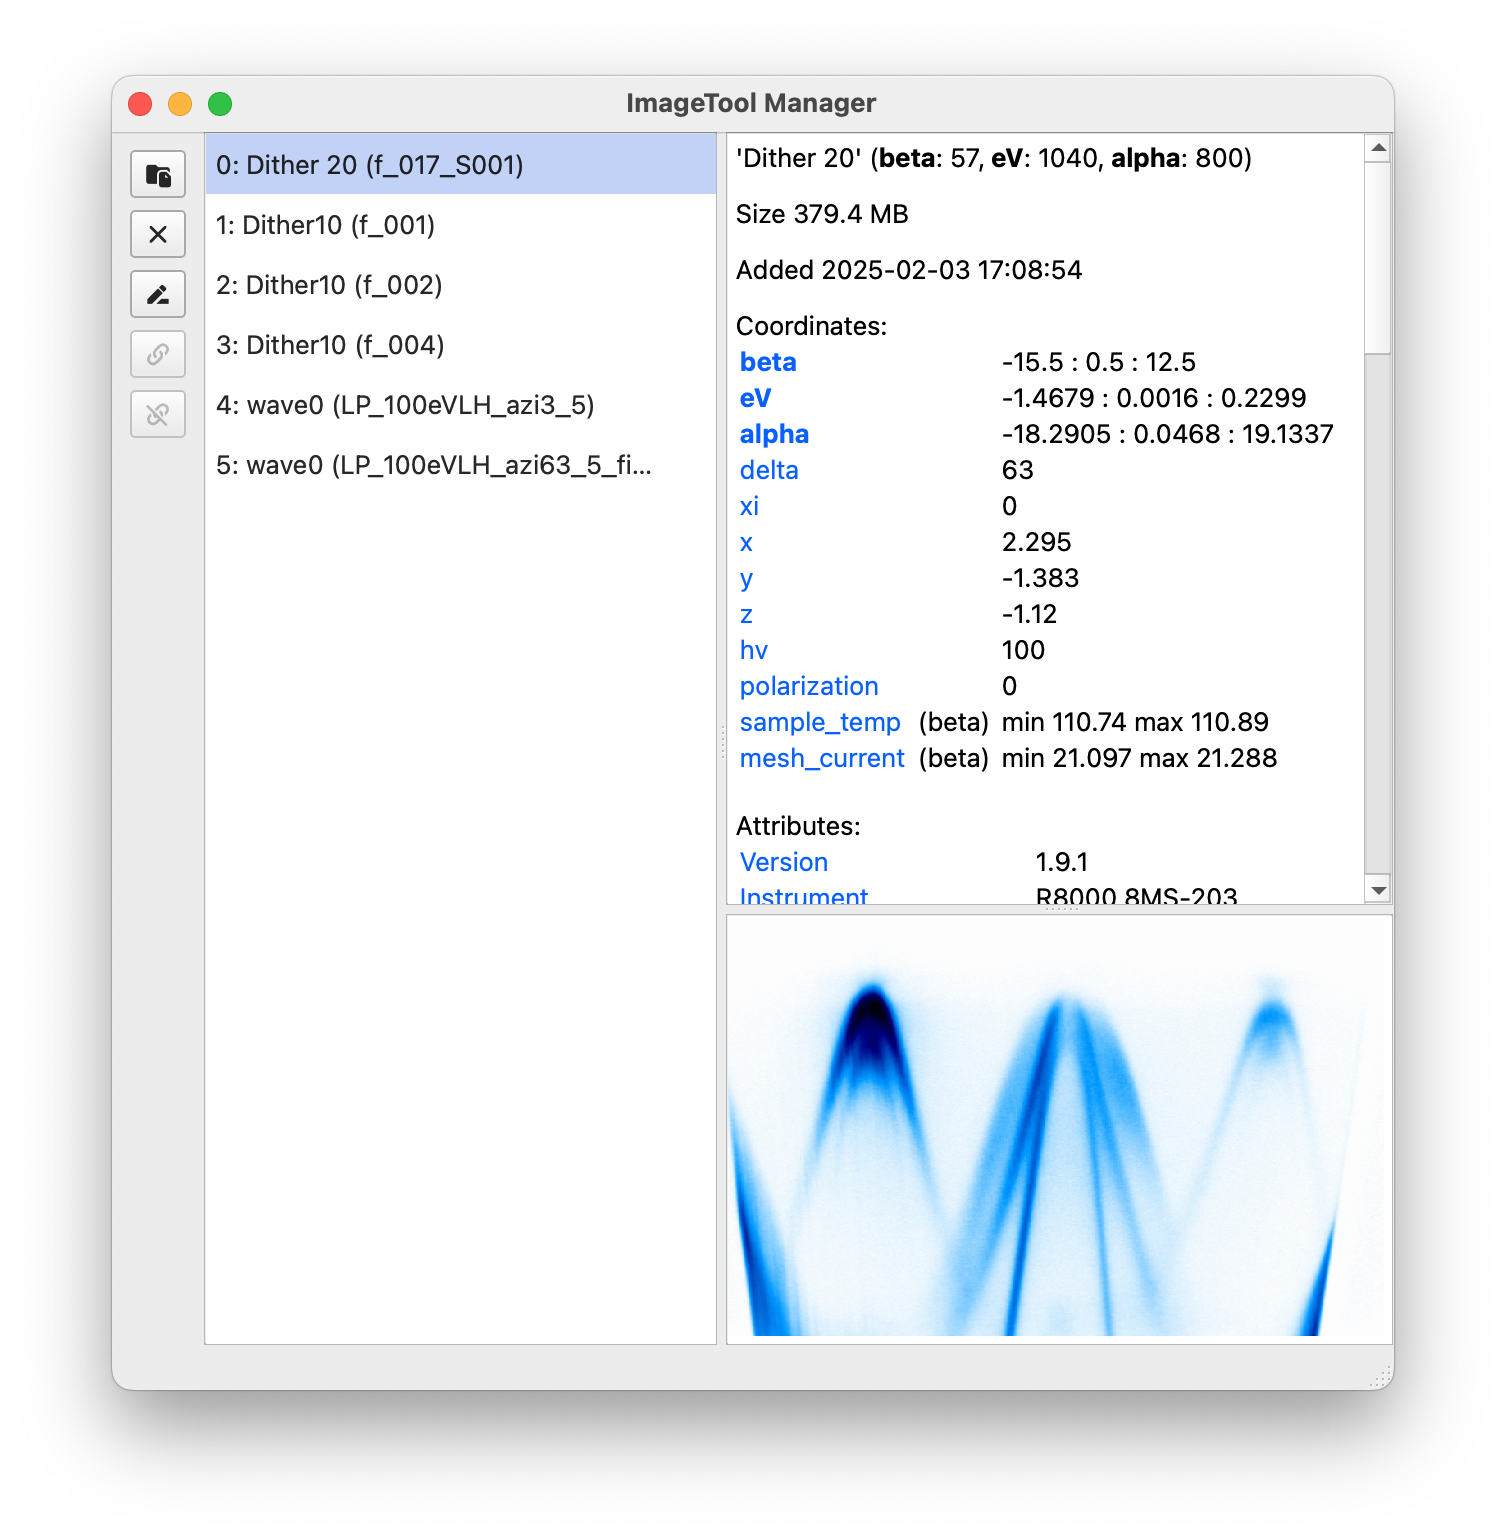
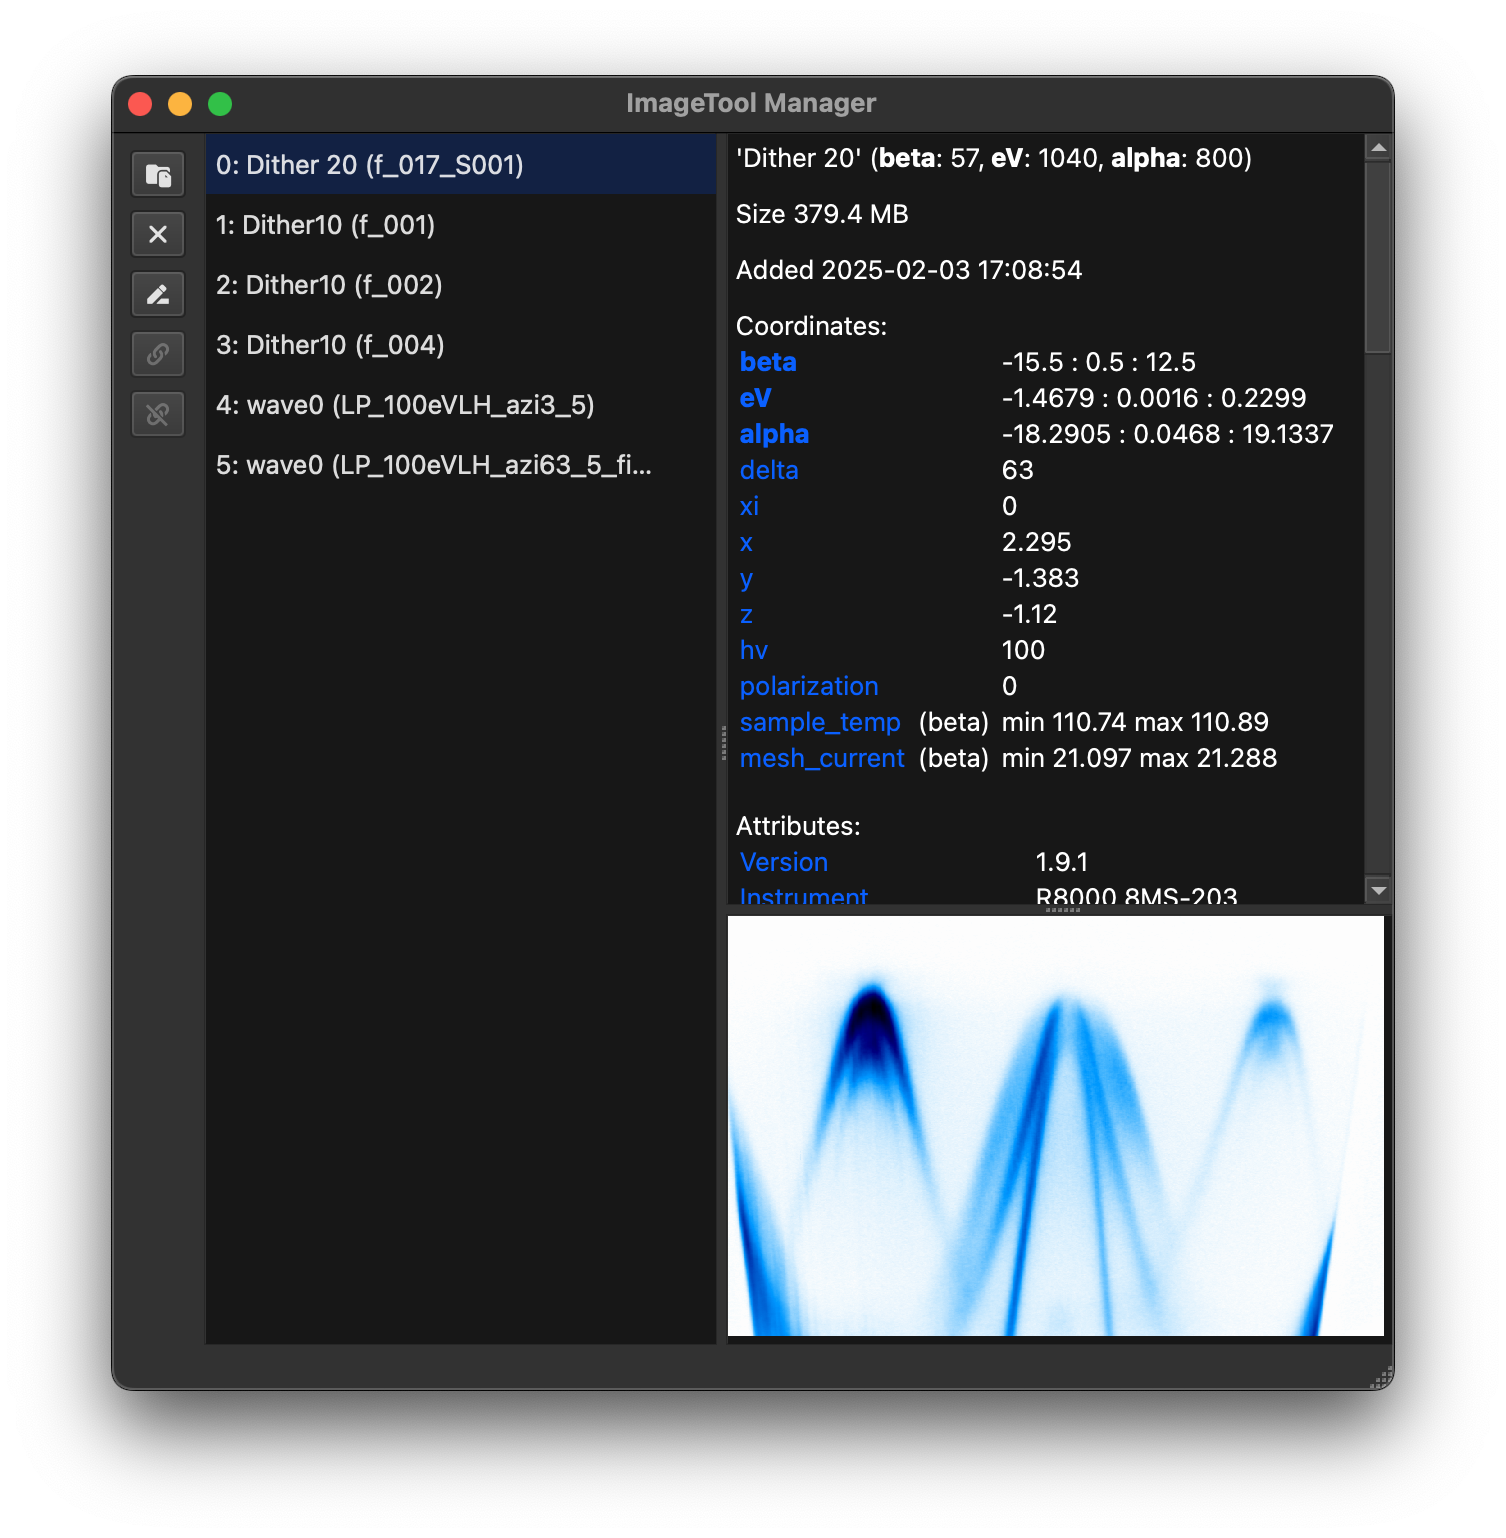
ImageToolManager keeps large analysis sessions organized. It tracks every ImageTool window, preview, and metadata entry in a single tree view so you can link, archive, and share them without juggling dozens of floating windows.
Why use the manager?
Launch and watch many ImageTool windows simultaneously without interrupting your notebook or script.
Link multiple ImageTools, duplicate them, or update their data in place in case of real-time data acquisition.
Save and reopen complete workspaces, including colormaps, cursor positions, window geometry, and ROIs.
Archive rarely used windows to disk so they can be restored later without consuming RAM.
Synchronize directly with Jupyter via
%watch, access data from scripts usingfetch, and perform quick analyses through a built-in IPython console.Drag-and-drop files to open them quickly, or use the integrated data explorer to browse preview data.
Starting the manager
Run itool-manager in a terminal or command prompt window in an environment where ERLabPy is installed.
Note
Only one manager can run per machine.
Opening an ImageTool window for the very first time after installing may take a couple of minutes as caches are built. Subsequent launches will be much faster.
The manager can be installed as a packaged build which enables some convenient features as described in Installing as a standalone application.
Opening and replacing ImageTool windows
Once the manager is running, you can open ImageTools in several ways:
xarray.DataArray.qshow()orerlab.interactive.imagetool.itool()withmanager=Truesends windows directly to the manager:data.qshow(manager=True) eri.itool([d1, d2], manager=True, replace=[1, 2])
Pass
replace=to update data in existing windows instead of creating new ones.ImageTool’s %itool magic command with the
--manager(or-m) flag in an IPython session or Jupyter notebook.%itool -m darr
The File → Move to Manager (Ctrl+Shift+M) action from an ImageTool window opened outside the manager. This action moves the active ImageTool to the manager.
Use the manager’s File → Open File… action to load data in a new ImageTool.
Drag and drop supported ARPES data into the manager window.
In the dialog that appears, you can choose the plugin to use for loading the data.
Hint
For scans that are recorded across multiple files, drag and dropping any file in the scan will automatically load and concatenate the entire scan. If you want to load only the file you dropped, choose the plugin suffixed with Single File in the dialog.
Launch the built-in data explorer from File → Data Explorer or Ctrl+E. Browse arbitrary folders, preview metadata, and open selected files in the manager.
Watch notebook variables with the
%watchmagic to create windows that stay synchronized with your data structures. See Notebook integration.For custom integration with other workflows, scripts can call
erlab.interactive.imagetool.manager.show_in_manager()orload_in_manager()directly (see Automation APIs).
Workspaces
Choose File → Save Workspace As… to save multiple open windows to a single .itws file. Workspaces store not only the data, but also the ImageTool settings such as cursor locations, colormaps, window geometry, and ROIs.
Saved ImageTool workspaces can be reloaded via File → Open Workspace… or by dragging the .itws file back into the manager to recreate your windows exactly as they were. Share the file with collaborators and they will see the identical layout.
Built-in explorer and console
Data Explorer – The explorer window (File → Data Explorer or Ctrl+E) provides a filesystem browser tailored for ARPES datasets. Preview metadata, queue batch loads, or open entire directories as tabs.
Console – Toggle the embedded IPython console with ⌃+ on macOS or Ctrl+ on Windows/Linux, or via the View menu. The console exposes a
toolslist containing wrappers for every ImageTool. For example:# List names of all windows [tool.name for tool in tools] # Access the underlying DataArray of the first window tools[0].data # Replace data in the first window tools[0].data = new_data
Run standard Python,
%magiccommands, or inspect objects with?exactly as you would in a notebook.
Notebook integration
The manager keeps notebooks synchronized through the %watch magic and exposes helper APIs for retrieving and storing data.
Watching notebook variables
Load the IPython extension and start watching variables:
%load_ext erlab.interactive
%watch my_data
Note
To load the extension automatically, add erlab.interactive to your IPython configuration, or configure VS Code’s Jupyter extension with
"jupyter.runStartupCommands": [
    "%load_ext erlab.interactive"
]
so %watch is always available.
Watching creates a labeled ImageTool window. Any time my_data changes in the notebook, the manager updates the matching window. Editing inside ImageTool—rotation, symmetrization, cropping, or other ImageTool operations—writes the results back to the notebook variable.
Note
To keep comparisons fast, only small subsets of large arrays are compared to check whether data has been modified. If a change slips by, re-run %watch my_data to force a refresh.
Controlling watches:
%watch data1 data2 data3   # add multiple variables
%watch                     # list watched names
%watch -d data1 data2      # stop watching specific variables
%watch -x data1            # stop watching and close the window
%watch -z                  # stop watching everything
%watch -xz                 # stop watching and close every watched window
You can also right-click a tool in the manager and choose Stop Watching.
If a variable is deleted or replaced with a non-DataArray, the manager automatically breaks the link and keeps the window as a regular ImageTool.
Note
When a notebook kernel shuts down, watched windows remain open in but no longer synchronize. Use Stop Watching or run %watch -z before closing the kernel to avoid confusion. Variables watched from different notebooks are color-coded for clarity.
Accessing manager data programmatically
Use fetch inside a notebook or script to copy data out of the manager:
from erlab.interactive.imagetool.manager import fetch

data = fetch(0)  # returns an xarray.DataArray copy
Because fetch returns a copy, you can safely modify it without touching the live window.
Automation APIs
If you wish to integrate the manager into custom workflows, you can programmatically load data and control ImageTool windows in the manager. Use the public helpers exported from erlab.interactive.imagetool.manager:
from erlab.interactive.imagetool.manager import load_in_manager, show_in_manager

# Open raw files and let the manager choose the loader interactively
load_in_manager(["scan1.pxt", "scan2.pxt"])

# Open two ImageTools and link their cursors
show_in_manager([data_a, data_b], link=True)

# Replace the dataset at index 3 with a new result
show_in_manager(new_data, replace=3)
Additional functions such as replace_data, watch_data, and unwatch_data give you finer control when building custom acquisition pipelines.
Under the hood these helpers communicate with the GUI via ZeroMQ, so they can be called from any Python process that can reach the manager (even on a different machine). See the API docs for details.
Installing as a standalone application
Standalone bundles for Windows and macOS let you run the manager without managing a Python environment. They add OS-level conveniences such as opening supported files by double-clicking them (or, on macOS, dropping files onto the Dock icon). For macOS 26 and later, the app also features a dynamic icon that matches the new design language.
Standalone bundles for Windows and macOS let you run the manager without managing a Python environment. They add OS-level conveniences such as opening supported files by double-clicking them (or, on macOS, dropping files onto the Dock icon) and include a macOS “liquid glass” icon for clarity.
Download the latest release from the project’s releases page, then follow the platform-specific steps below. For other platforms, or if you prefer full control, build from source via Build from source.
Windows
Download the latest Windows build
.zipfile from the releases page.Extract it and double-click the included
.exeinstaller, then follow the prompts.
macOS
Download the latest
.ziparchive that matches your architecture from the releases page.Extract it to obtain
ImageTool Manager.app.Move the app into
/Applications(or any folder you prefer) and launch it like any other macOS application.
Updating the application
Updates can be checked and installed from within the application itself. Select Check for Updates… in the menu bar under Help (Windows) or ImageTool Manager next to (macOS) and follow the prompts.
Build from source
If you want to build the standalone application from source due to platform compatibility or other reasons, follow these steps:
Clone the repository:
git clone https://github.com/kmnhan/erlabpy.git
cd erlabpy
Install dependencies (requires
uv):uv sync --all-extras --group pyinstaller --group pyqt6
Build the application:
uv run pyinstaller manager.spec
The resulting app will be in
dist/ImageTool Manager.(Optional, Windows only) Install Inno Setup and add to your system PATH. Then run
iscc manager.issto create an installer file.